Tuesday, July 12, 2011

Projects, projects, projects

There are a few small projects in process at my house this week. Here is a glimpse of what's to come...


This charming vintage chandelier was only $7.00 at a garage sale! It is going to get re-wired and painted. I have been collecting vintage crystals for this chandelier. I need to find more, but these will be a good start. Why is it so hard to find vintage crystals?


Aren't the colors on this bench perfect for a little boys room? It is going to make a perfect storage area! My mother in-law gave it to me and I am quite excited to fix it up. There are a couple spindles that need to be fixed. Some moldings will be added, then sanded, painted, and glazed. It is going to be a fun piece to work on for sure.


I have gathered all of the unused picture frames around my house; they are all going to be painted white...perfect for a gallery wall somewhere in my home.


This light is going to get a fresh coat of paint and cleaned up. It is going to look new again as soon as I am finished with it.


Thanks for reading!


Thursday, July 7, 2011

Fun Beach Craft for Kids

While on vacation a couple weeks ago, we spent our first week at a beautiful ocean front beach house in Nags Head, NC. with my entire family. We absolutely LOVE the beach!

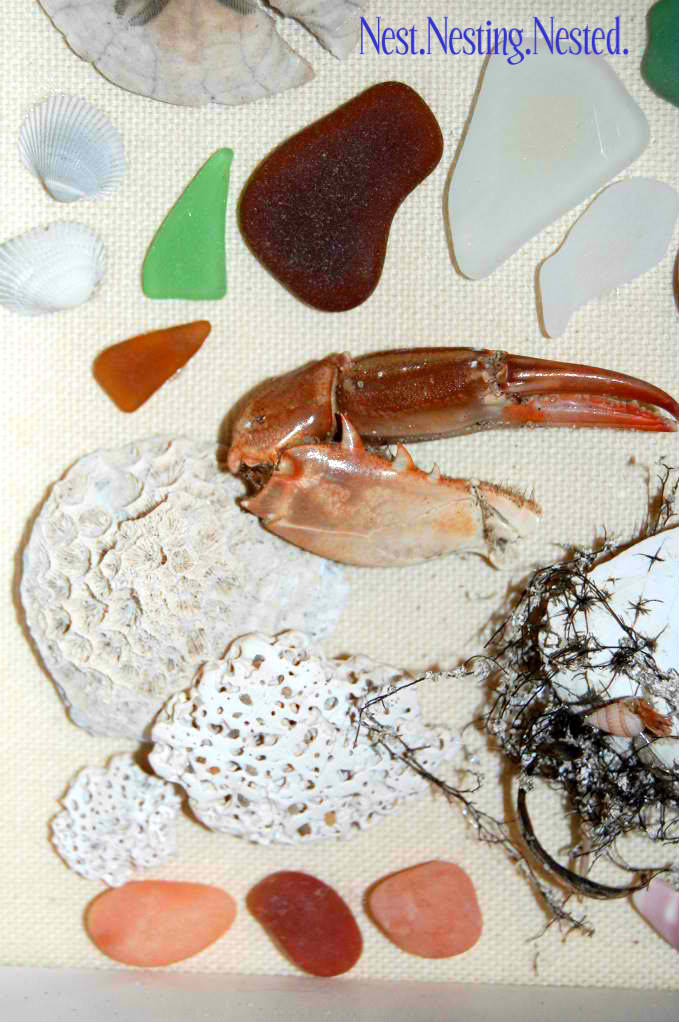
This year as my two little boys and I were searching the sand for sea glass and shells, my boys found a lot of cool creatures, shells, and other fun things. All of the little creatures (crabs, sand dollars, star fish, etc.) were obviously dead, but my boys had no problem picking them up and playing with them...they are true boys! We ended up with quite the collection of shells, sea glass, crab arms, a set of vertebrae, starfish, sand dollars, etc. It really was so much fun to see the excitement in my little boys' sweet faces every time we found another interesting thing in the sand.

Today my boys and I created a shadow box full of their beach treasures. They were so excited to create something so "awesome" to hang on their wall.


Have a wonderful weekend!

Thanks for reading!!!

Wednesday, July 6, 2011

Charming Ribbon and Button Napkin Rings

Sorry this post is a day late, I had planned to post yesterday but accidentally had it scheduled to post today. Anyways, here are some super easy and charming napkins rings that I made with little time and money.


The idea for these napkin rings came from one of my favorite books, Shoestring Chic.
All you need for this project is a little ribbon, some buttons, and napkins.
First, I rolled each napkin and then tied them with a piece of ribbon.
Next, these vintage buttons were each threaded with a piece of white embroidery floss.
The buttons were then tied to each ribbon on every napkin.
Simple as that...you have some charming napkins rings that will be perfect for any table setting.


I placed my napkins in a jar, ready to pull out for any family meal.


Thanks for reading!

Click on the links in my "Favorite Places to Link" page to check out the linky parties that I have joined.
Thank you!

Thursday, June 30, 2011

Vintage Lace Lampshade

Nest.Nesting.Nested has moved and changed names to LeCultivateur.com. Here is the link to view this post at LeCultivateur.....   https://lecultivateur.com/2018/03/28/vintage-lace-lampshade/


Thank you so much for visiting Nest.Nesting.Nested! I hope you visit my new blog, LeCultivateur.com
💗~Emily

Tuesday, June 28, 2011

Fun Little Lucketts Find

While I was on vacation a couple weeks ago, I stopped by Lucketts, in Leesburg Va. There were so many things that I would have loved to buy, but considering I live across the country and would have had to somehow get everything that I bought back home, I was only able to pick up a few small items. This little set of drawers instantly caught my eye. I love the color!


How cute is that hardware? Love it!


It took me a few days, actually a couple weeks, to find the perfect place for this little darling. My mom always says that if you love something, you will surely find a place for it, and that I did.


Sunday, June 26, 2011

beautiful hutch with built-in plate rack

I am thrilled to share this beautiful hutch transformation with you all today!
What makes this so exciting for me? The plate rack in this darling hutch was built using my DIY Plate Rack Tutorial. I received a sweet comment from Kathy about my plate rack tutorial, she was going to build one too. I was so excited! I replied and told her that I would love to see picutres of her plate rack when she finished. She so kindly sent me these pictures and said that I could share them with you all as well.

This is how the hutch started out...

To this...


Now...

Isn't this such a beautiful transformation!?!
I absolutely love it!
Thank you so much Kathy for sharing this with me and all my lovely readers.


~ Do you have a project that you created using one of my tutorials or ideas?
I would seriously LOVE to see it, and even share it with my readers if you would like.
Please email me at nestnestingnested@gmail.com ~
Thanks to all my sweet readers!